3.1. Installing Arduino IDE
3.1.1. What is the Arduino IDE?
The Arduino IDE (Integrated Developement Environment) is a software developement platform which we will use to program our Arduino Nano microcontrollers.
3.1.2. Installing the Arduino IDE
If you are on Windows or Mac OS, the official arduino website has all the links required for you to install it on your device:
If you are running Linux or trying to install the Arduino IDE on your Raspberry Pi 5, the easiest way to proceed is by using the Snap Store which is pre-installed on all Ubuntu Linux Desktop versions, it’s an app called: App Center.
If you don’t have access to the Snap Store (no reason not to), you can also run the following command to install the Arduino IDE from the terminal line:
sudo snap install arduino
Once you have finished the installation, you need to give this new program the permissions to read and write over your usb ports. To do this, open up a terminal and run this command:
sudo usermod -a -G dialout $USER
Then reboot your computer by clicking on the power button on the top right of the desktop or by running this command:
sudo reboot
If you are on Windows 10 or 11, in addition to the IDE, you might also need to install a driver for the CH340 USB-UART transceiver on the Arduino Nano. To test whether this driver is installed by default on your computer, let’s try to detect an Arduino!
Note
The CH340 chip soldered onto the Arduino converts the USB signal coming from your computer’s USB port to the UART signal that the ATMEGA328P processor (actually microcontroller) understands.
3.1.3. Connecting Arduino to Laptop
Unpack your Arduino Nano and plug it into your computer with a usb-c cable:
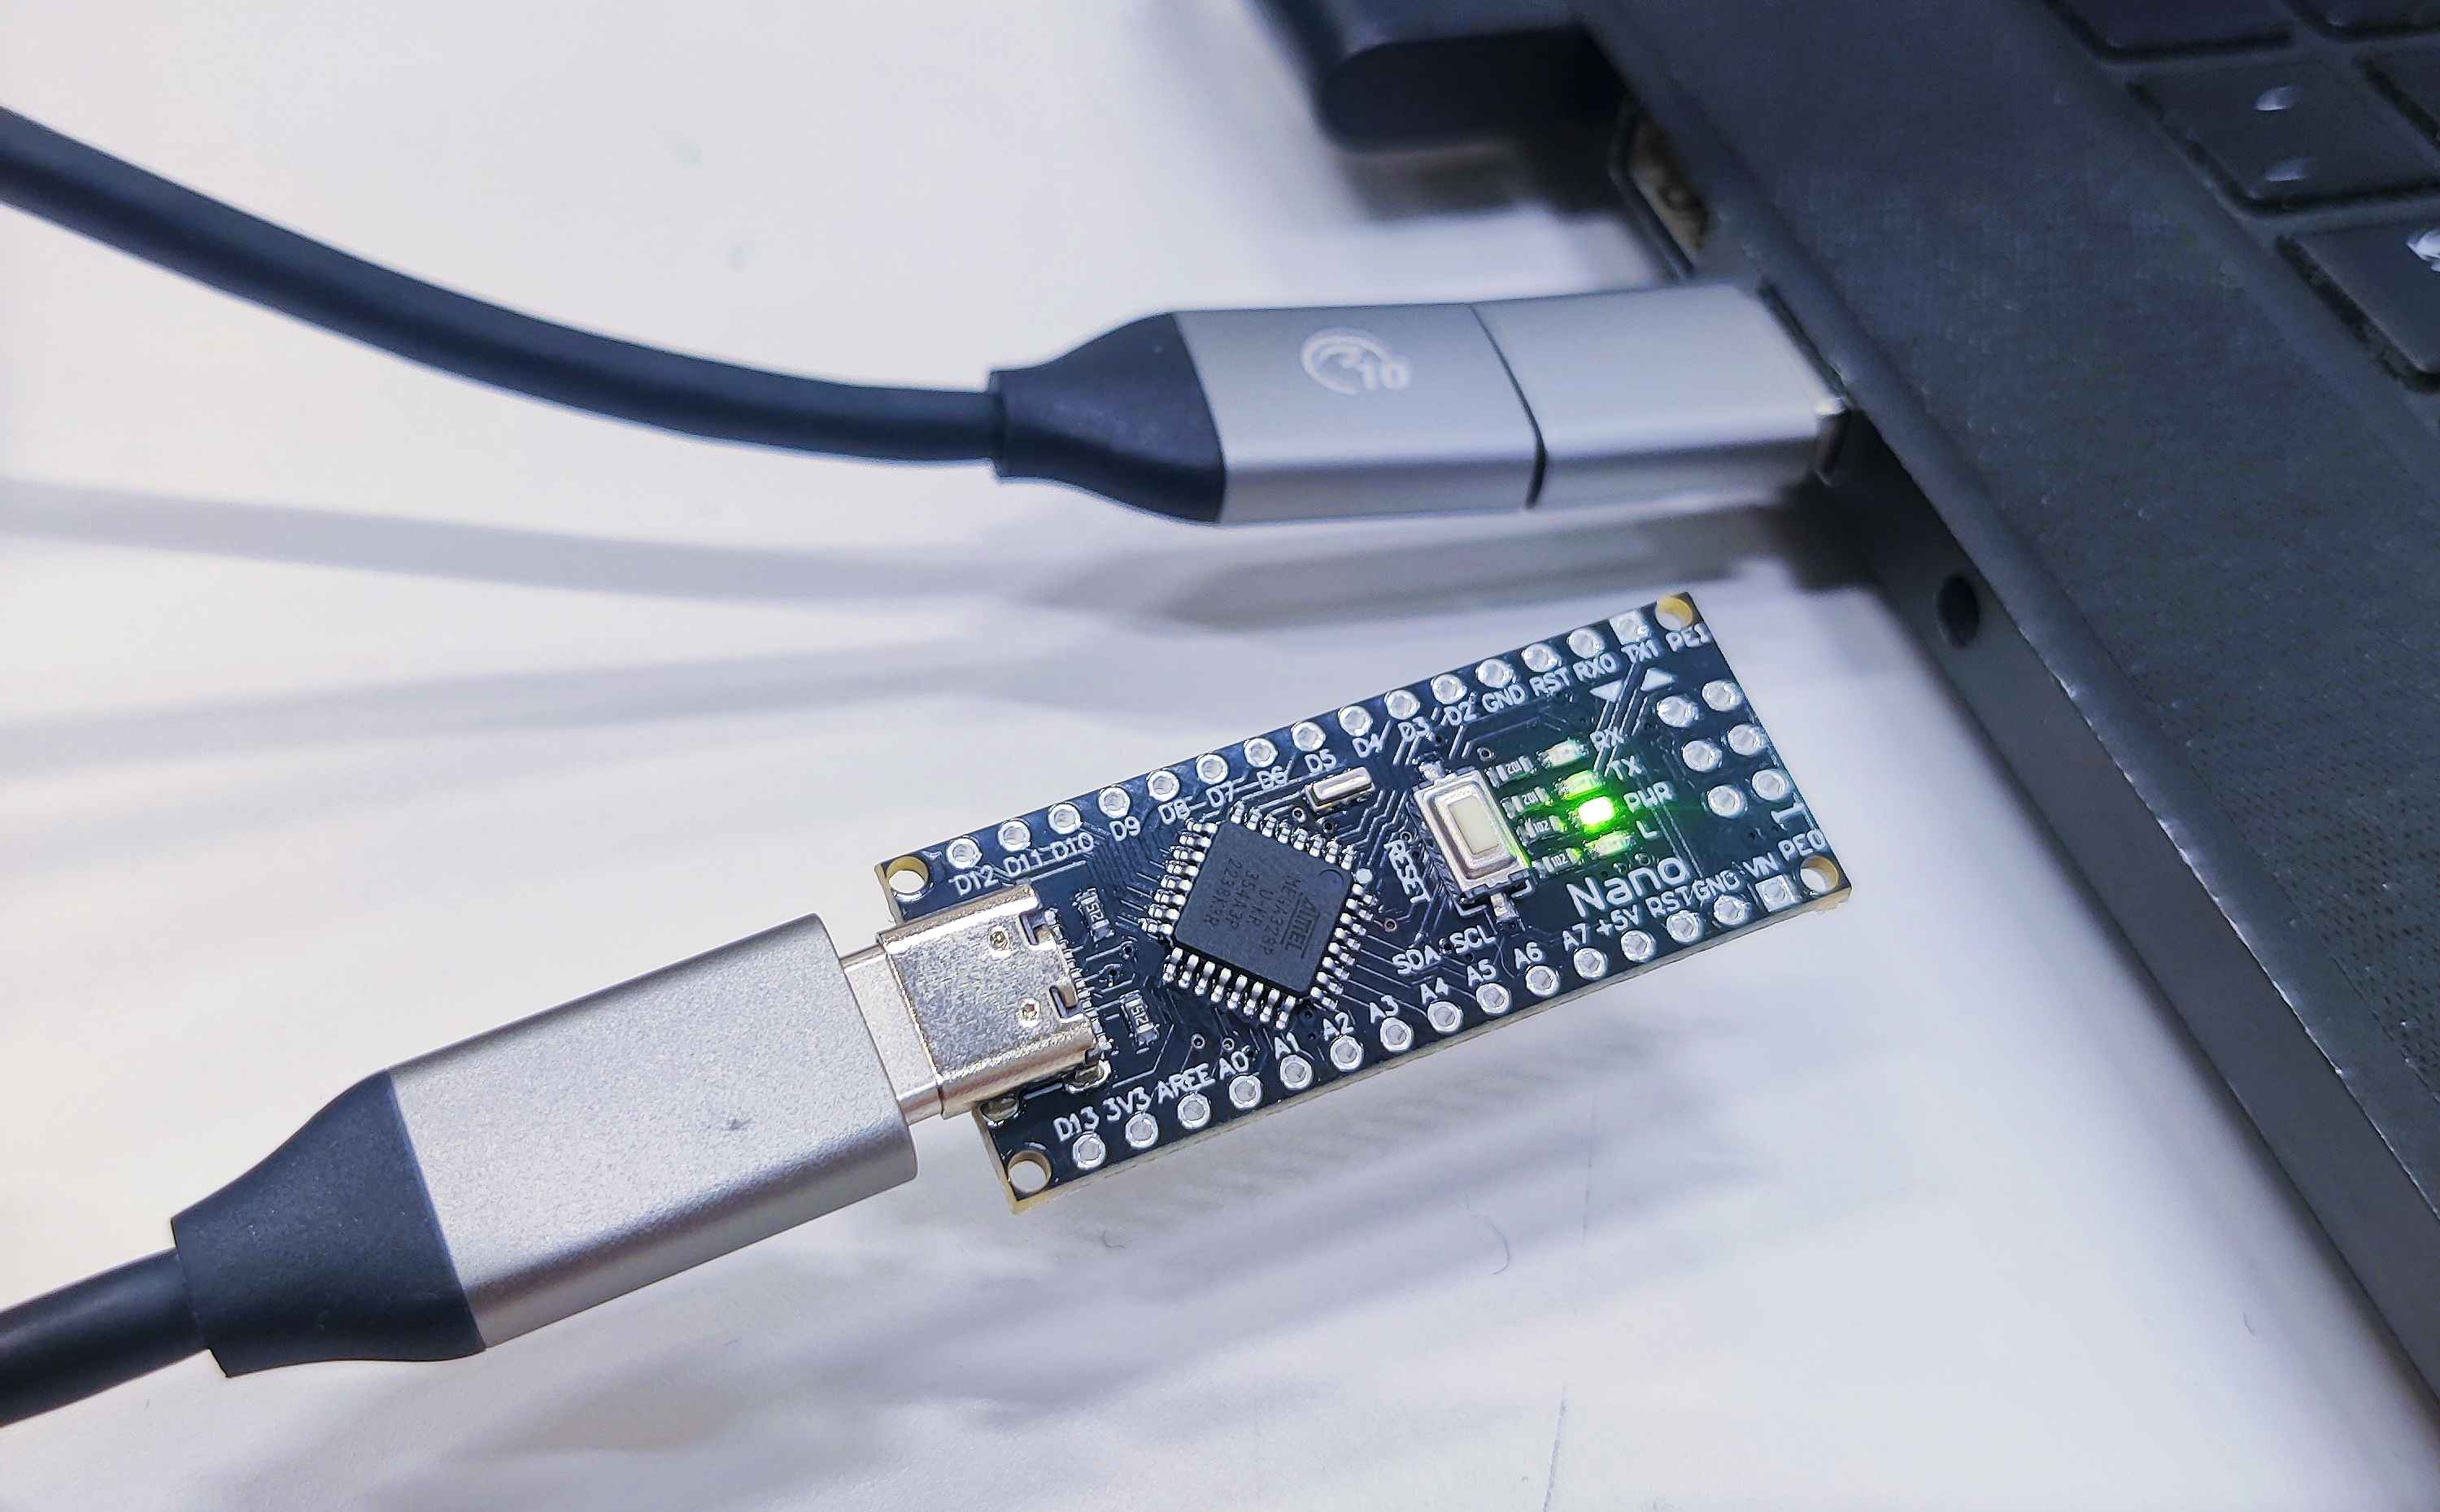
Figure 3.1.3.1: Plug your arduino nano into your computer
Warning
To cut costs, some cheap USB cables only have 2 copper wires inside, make sure your cable has power AND communication wires inside of it!
Wait about 30 seconds for your computer to initialize all needed drivers to talk to the arduino and then launch the Arduino IDE.
You will be greeted with a standard shell of code but first, you will have to find the correct COM port (communication port) and set it up. Each USB port on your computer is assigned to a COM port with a specific number, we will now try to understand which one has an Arduino connected to it.
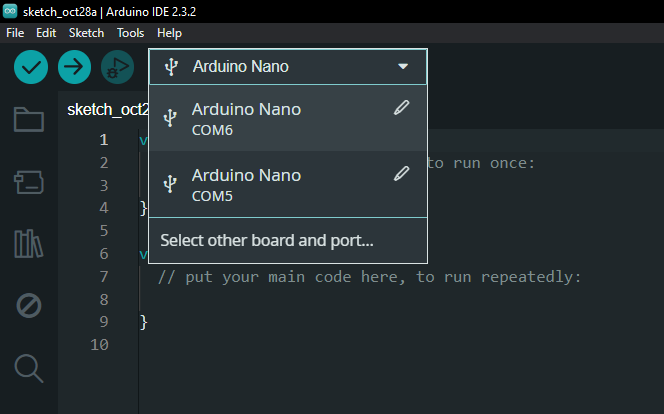
Figure 3.1.3.2: Selecting a COM port on the Arduino IDE
To do this, we will assign the Arduino Nano board to each one of your ports and we will try flash code over each one of the ports until we get a successful code upload:
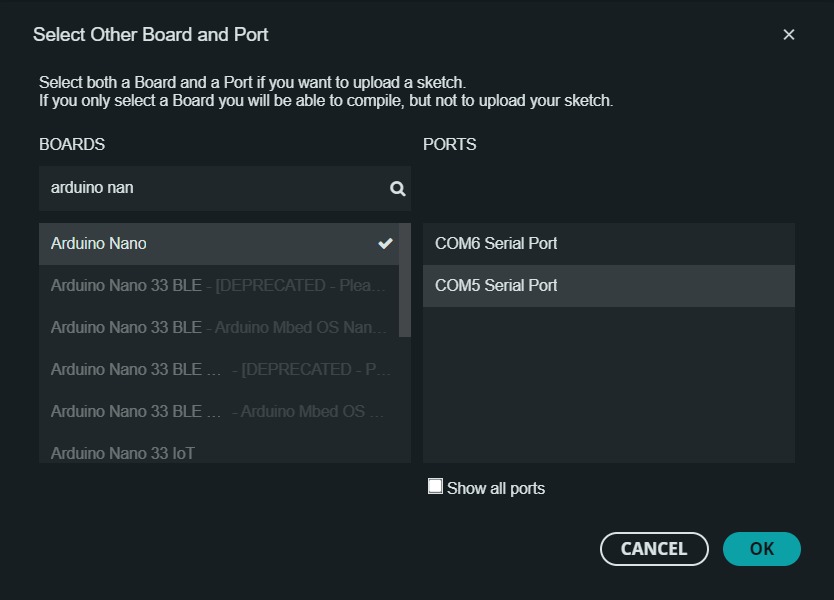
Figure 3.1.3.3: Assigning arduino nano configuration to COM ports
Next we will setup the bootloader option for our style of Arduino Nano.
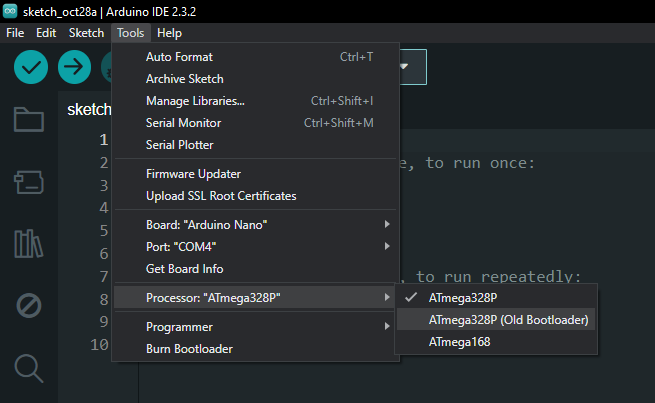
Figure 3.1.3.4: Assigning “Old Bootloader” to Processor
Note
The bootloader is a little program burnt into the very first memory address of your Arduino. Once you power it on, it starts by executing the code in the bootloader which serves to load your freshly written code into the right place for it to then be executed by the arduino.
3.1.4. Flashing our First Program
Finally, we will open a standard code example written by Arduino which blinks the red LED soldered on your Arduino Nano. We are doing this to have a visual feedback telling us if our code upload has succeeded.
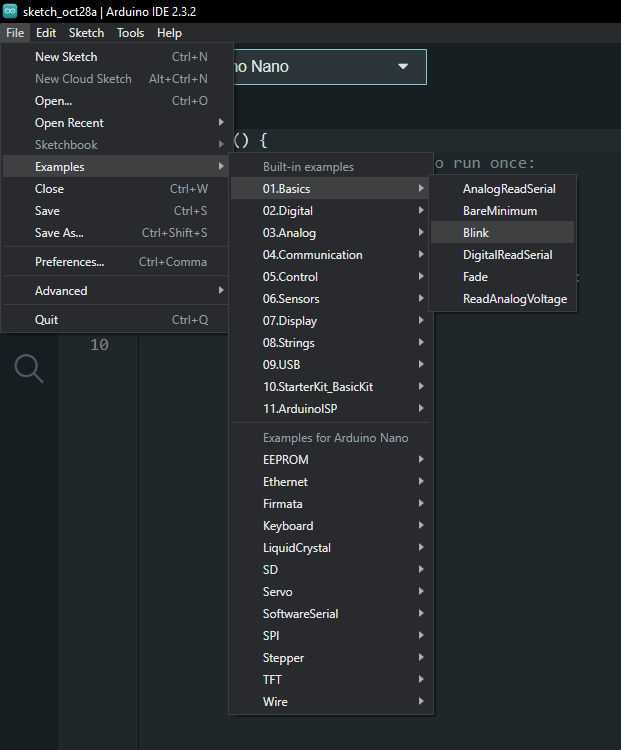
Figure 3.1.4.1: Loading Blink Sketch
Now we can simply select one of our COM ports at random (which should be renamed “Arduino Nano” after you selected this in Figure 3.1.3.2).
You can now click on the upload button to compile and flash our sketch to your arduino:

Figure 3.1.4.2: Compiling and uploading our sketch to the arduino
Note
If you haven’t clicked on the “Verify” button on the left of the “Upload” button, the IDE will automagically verify for you, then compile and upload your code to the arduino
If you can see the red LED on the Arduino blinking for 1000ms (1 second) on and 1000ms off, then you are very lucky as the COM port you chose was correct and the CH340 driver was already installed on your computer!
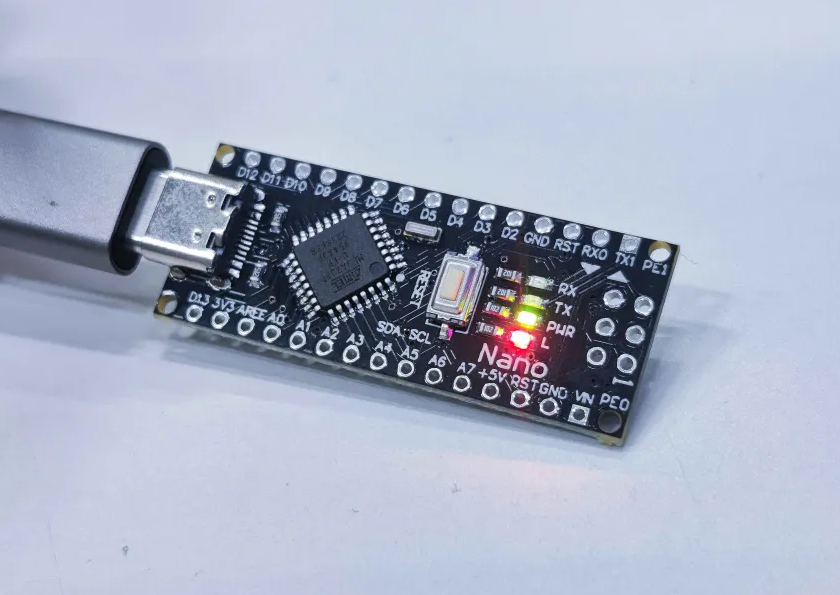
Figure 3.1.4.3: Red LED blinking on your Arduino
Congratulations, you now know how to flash code to your Arduino Nano!
3.1.5. Troubleshooting Connections
If instead you got an error on the terminal, your port was wrong or you need to install the CH340 driver, or both! First try out every single one of your COM ports and if none of them work, follow the tutorial to install the CH340 driver:
Figure 3.1.5.1: Install CH340 Drivers - Sparkfun
Once you’ve finished the above tutorial, restart your computer and try the entire process again starting from the beginning.


Please signal any mistake to: errata@microver.ch