4.10. Docker
The advanced microver.ch project requires two computers:
A laptop (provided by you)
The onboard computer (in the kit)
Both of these computers will be communicating together. The laptop will serve as your control station and the Raspberry Pi 5 (onboard computer) will be inside your rover.
The downside to making you use your personal laptop is that everybody will have a different device with its own operating system (OS):
Windows 10/11
MacOS
Linux (Ubuntu or others)
One of the founding values of this project is Simplicity, therefore, in an attempt to standardize the various tasks you will have to achieve, we will install a program on your laptop called Docker.
4.10.1. Why Docker?
Docker is a tool used to run your application in containers instead of running them directly on your host operating system which is known as running your applications “bare metal”:
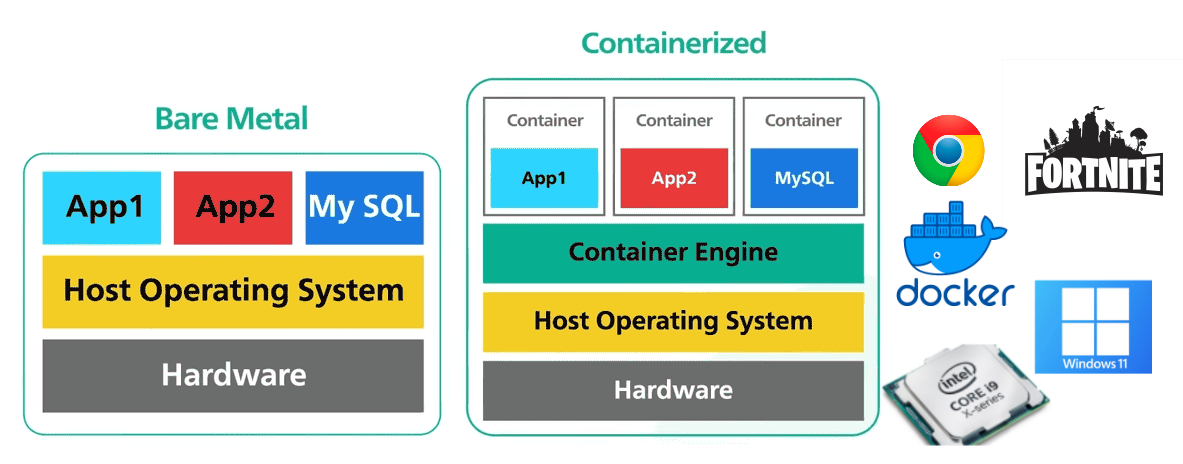
Figure 4.1.1.1 Abstraction Layers
As you can see, running an application bare metal means that all the system calls (the non-stop commands your applications are making to your operating system) are done right to the host operating system.
Instead, with a containerized application, the system calls of your applications are done to the container engine (Docker Engine in our case) which will then translate those syscalls to the correct ones for the operating system it’s currently running on (the host).
Hint
Imagine that each Operating System is a person who only speaks one language:
Windows 11 speaks French
MacOS speaks Chinese
Linux speaks Japanese
You are a programmer making a new version of Minecraft with hexagon shaped blocks. Well you need to write your game in French, Chinese and Japanese in order to make it work for all three operating systems.
Docker engine is a polyglot translator whom you only speak english to and who will translate all your english syscalls to French, Chinese and Japanese depending on who they are currently speaking to.
Therefore, once you have installed Docker on your laptop, all the instructions in our documentation will apply to you regardless whether you have a Mac, a Windows PC or a Linux machine. They will be in English and Docker will do all the translation work.
4.10.2. Docker Engine or Desktop?
Docker comes in two forms:
Docker Engine
Docker Desktop
The Docker Engine is the powerful translator that was just described and Docker Desktop is the desktop application that was developped to easily setup the docker engine.
If you wanted to install Docker on a remote server with no screen you would use the docker engine only but as we are using it on our laptop, we will be installing Docker Desktop (which has Docker engine under the hood).
4.10.3. Installing Docker Desktop
If you are using Windows or MacOS, installing Docker Desktop is a single click download from Docker’s official website:
If you are using Linux, it’s a litte more complex. If you are using Ubuntu Noble 24.04 (LTS), the process is documented right under the following Danger box. For fancy Linux distros, please follow the official installation instructions from Docker’s website:
If you are currently using the Ubuntu Noble 24.04 (LTS) distribution of Linux you can install Docker Desktop with the following instructions (adapted from the official website):
Danger
Installs Docker Desktop only for Ubuntu Noble 24.04 (LTS)
# Make sure the kernel modules for kvm are loaded

modprobe kvm
modprobe kvm_intel  # Run if you have an Intel processor
modprobe kvm_amd    # Run if you have an AMD processor
# Check the modules are correctly loaded

lsmod | grep kvm
# Add your user to the kvm group

sudo usermod -aG kvm $USER
# Uninstall old docker versions

for pkg in docker.io docker-doc docker-compose \
docker-compose-v2 podman-docker containerd runc; \
do sudo apt-get remove $pkg; \
done
# Add Docker's official GPG key:

sudo apt-get update
sudo apt-get install ca-certificates curl
sudo install -m 0755 -d /etc/apt/keyrings
sudo curl -fsSL https://download.docker.com/linux/ubuntu/gpg \
-o /etc/apt/keyrings/docker.asc
sudo chmod a+r /etc/apt/keyrings/docker.asc
# Add the repository to Apt sources:

echo "deb [arch=$(dpkg --print-architecture) signed-by=/etc/apt/keyrings/docker.asc] https://download.docker.com/linux/ubuntu $(. /etc/os-release && echo "${UBUNTU_CODENAME:-$VERSION_CODENAME}") stable" \
| sudo tee /etc/apt/sources.list.d/docker.list > /dev/null
sudo apt-get update
# Download .deb package (357Mb)

curl -O https://desktop.docker.com/linux/main/amd64/docker-desktop-amd64.deb?utm_source=docker&utm_medium=webreferral&utm_campaign=docs-driven-download-linux-amd64
# Install to Device

sudo apt-get install ./docker-desktop-amd64.deb

# Ignore the error message saying:
# >> Download is performed unsandboxed as root as file .....
# Remove .deb package

rm ./docker-desktop-amd64.deb
# Open Docker Desktop

systemctl --user start docker-desktop
Congratulations, you have successfully installed Docker Desktop on your machine!
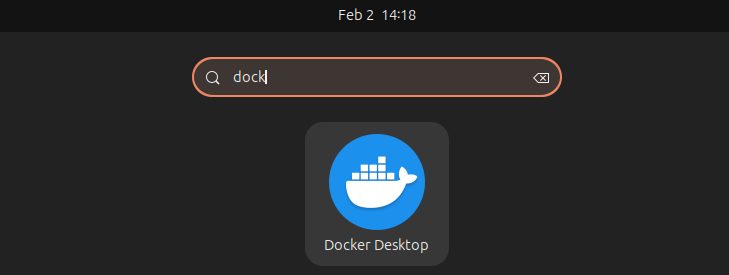
4.10.4. Launching Docker Desktop
Open Docker Desktop by looking for the program with the search bar of your desktop:
Accept all of their terms of conditions and then feel free to skip all the login and survey questions they will ask you:
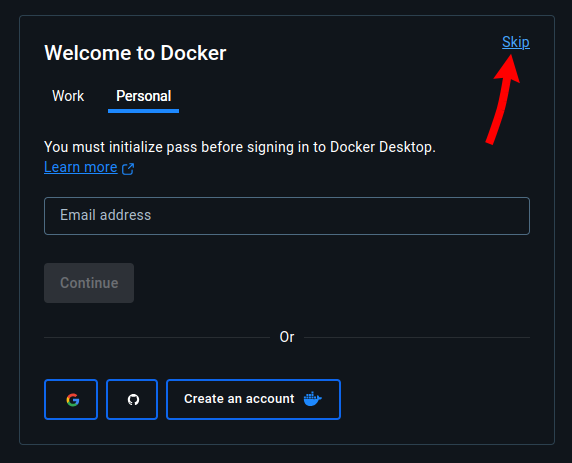
Congratulations, you are now be in the main application!
4.10.5. Pulling an Image
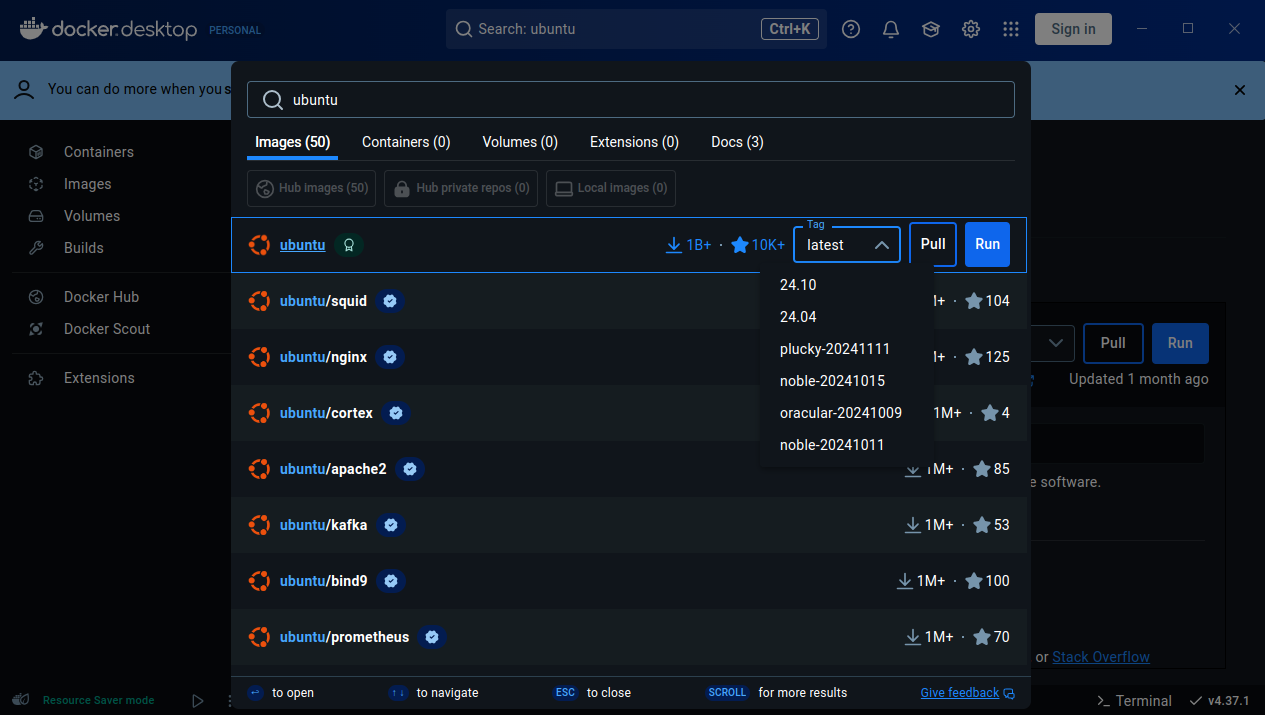
Congratulations, you are now be in the main application!
4.10.6. Installing Docker Engine
If you are currently using the Ubuntu Noble 24.04 (LTS) distribution of Linux you can install the Docker Engine with the following instructions:
Danger
Installs Docker Engine only for Ubuntu Noble 24.04 (LTS)
# Start by uninstalling old versions

for pkg in docker.io docker-doc docker-compose \
docker-compose-v2 podman-docker containerd runc; \
do sudo apt-get remove $pkg; \
done
Set up Docker’s apt repository
# Add Docker's official GPG key:

sudo apt-get update
sudo apt-get install ca-certificates curl
sudo install -m 0755 -d /etc/apt/keyrings
sudo curl -fsSL https://download.docker.com/linux/ubuntu/gpg \
-o /etc/apt/keyrings/docker.asc
sudo chmod a+r /etc/apt/keyrings/docker.asc

# Add the repository to Apt sources:

echo "deb [arch=$(dpkg --print-architecture) signed-by=/etc/apt/keyrings/docker.asc] https://download.docker.com/linux/ubuntu $(. /etc/os-release && echo "${UBUNTU_CODENAME:-$VERSION_CODENAME}") stable" \
| sudo tee /etc/apt/sources.list.d/docker.list > /dev/null
sudo apt-get update
Install the Docker Packages (about 500Mb)
# Installing Docker

sudo apt-get install docker-ce docker-ce-cli containerd.io \
docker-buildx-plugin docker-compose-plugin
Make sure it works by running the Hello World docker image:
sudo docker run hello-world
You should get a successful message that will look like this:
Hello from Docker!
This message shows that your installation
appears to be working correctly.

To generate this message, Docker took the following steps:
1. The Docker client contacted the Docker daemon.
2. The Docker daemon pulled the "hello-world" image from
   the Docker Hub. (amd64)
3. The Docker daemon created a new container from that
   image which runs the executable that produces the output
   you are currently reading.
4. The Docker daemon streamed that output to the Docker client,
   which sent it to your terminal.
You can now try to run a standard Ubuntu image:
sudo docker run -it ubuntu bash
It will change how your terminal looks and running ls should give this:
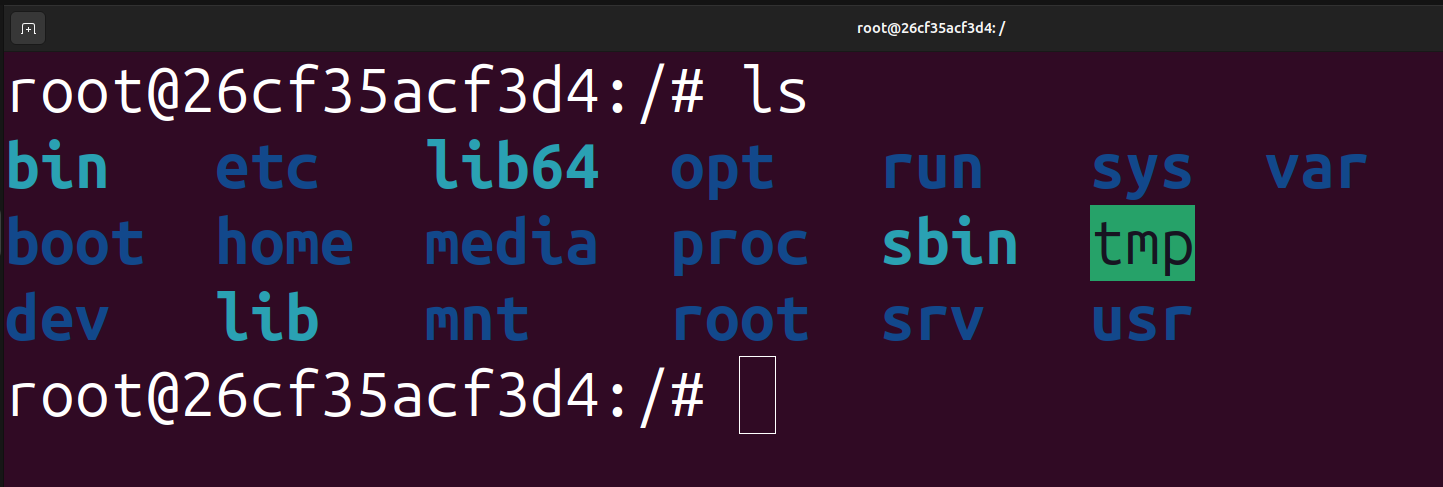
You can exit this Docker container by running exit
Congratulations, you now have Docker Engine installed on your device!
4.10.7. Virtual Machine
Which network to select: https://www.howtogeek.com/devops/which-type-of-networking-should-you-use-for-your-virtual-machine/
DDS Spec: https://www.omg.org/spec/DDSI-RTPS/2.3/PDF
Good Virtualbox tutorial: https://www.theroboticsspace.com/blog/How-To-Install-ROS-2-in-Ubuntu-22-04-VM-On-Windows/
Raspi Doc: https://www.raspberrypi.com/documentation/computers/remote-access.html#ip-address
Virtualbox setup: https://www.virtualbox.org/wiki/Linux_Downloads sudo apt install ./ path to debian file sudo usermod -aG vboxusers $USER


Please signal any mistake to: errata@microver.ch