4.1. Installing Raspberry Pi
4.1.1. What is the Raspberry Pi 5?
The Raspberry Pi 5 is the Onboard Computer (OBC) that will communicate with your laptop and control all of the rover’s movements.
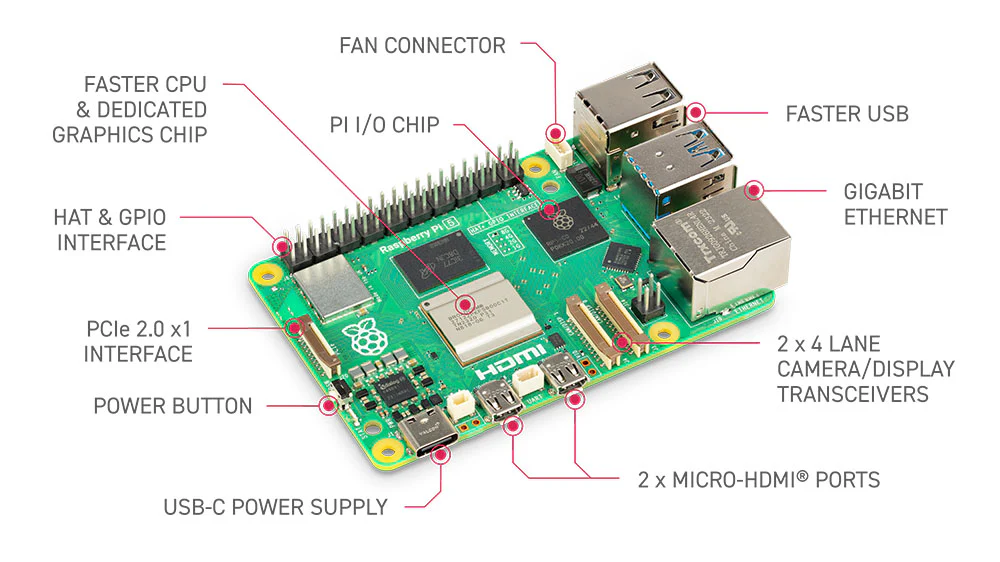
Figure 4.1.1.1: Raspberry Pi 5
Note
The Raspberry Pi is a computer exactly like your laptop with the exception that is has no keyboard and no display!
Before being able to write code for your Raspberry Pi, you need to install an Operating System (OS) on it, exactly like a Microsoft computer has Windows 11 installed or a Macbook has MacOS.
4.1.2. Why do we use Linux?
We choose to install a new operating system called Linux, it has exactly the same functionalities as Windows 11 or MacOS: it powers your screen, knows how to read a USB port to receive keystrokes from a keyboard, can run programs like a web browser.
The only difference is that Linux is fully open source which means that anybody can write a new piece of software to add a new functionality to it. Unlike Windows 11 or MacOS which are closed source which means that you have no idea what this new program that you just installed on your computer will do to it.
Warning
You should care about what kind of software you use as, in today’s world, data is money and every company will go as far as the law lets them (and then a little further) to send personal data from your computer to their servers to then, give you targetted advertisements or worse, resell your data to data brokers that any other company can then purchase.
4.1.3. What are “Linux Distros”?
There are a plethora of versions of Linux, they are called distributions or “distros”. They all do basically the same thing but some have the icons on the bottom, some on the side. Some come with programs preinstalled, some without.
In our case, we choose to use Ubuntu which is a descendant of Debian:
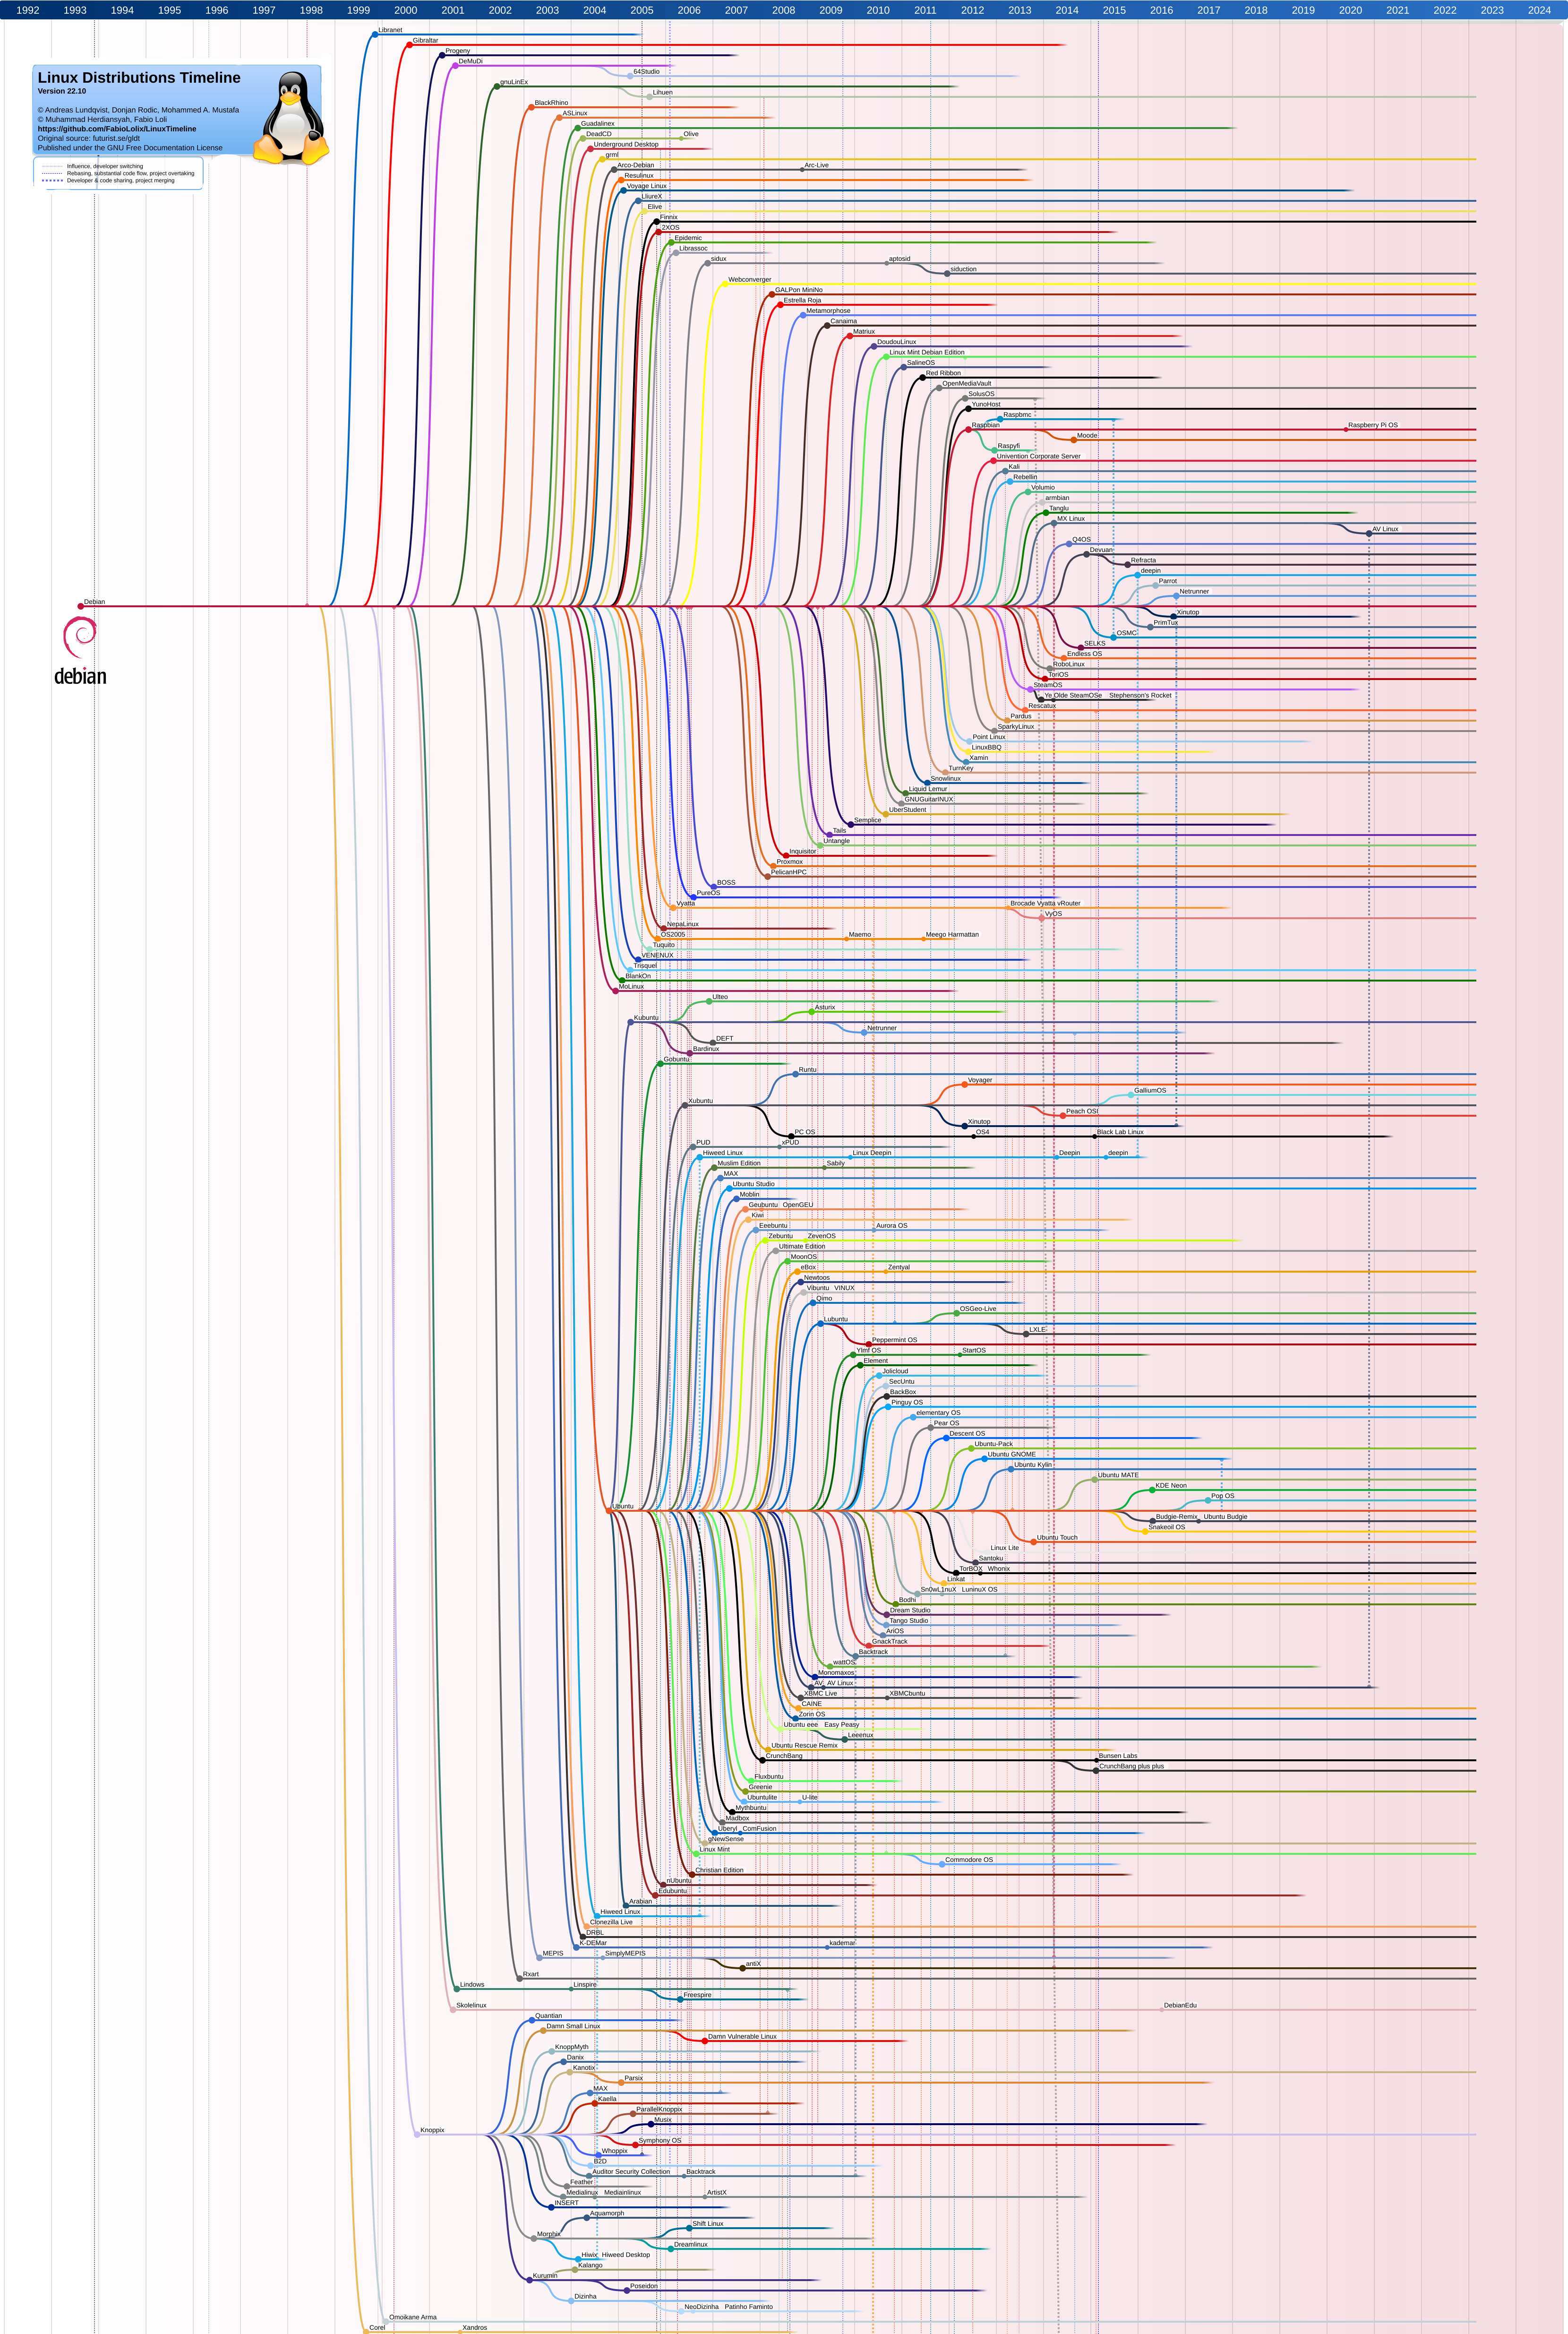
Figure 4.1.3.1: Debian Family Tree
We use Ubuntu as the entire robotics community is using it and therefore, every piece of software that they write will work out-of-the-box for us.
More specifically, we will use Ubuntu 24.04, code name “Noble Numbat” as it is the most recent version with Long Term Support (LTS) until 2029.
We will not be using Raspberry Pi OS, the custom “distro” of Linux made by the Raspberry Pi company for their computers (find it in the tree) as it doesn’t support ROS2 (Robot Operating System v2). For more info about ROS2, check out:
4.1.4. How to Install Ubuntu 24.04
First, unpack your microver.ch kit and find the:
Plug them all into eachother and plug this into your laptop. Now install the Raspberry Pi Imager software which will flash an OS on your Raspberry Pi:
Launch the program, and select the following settings:
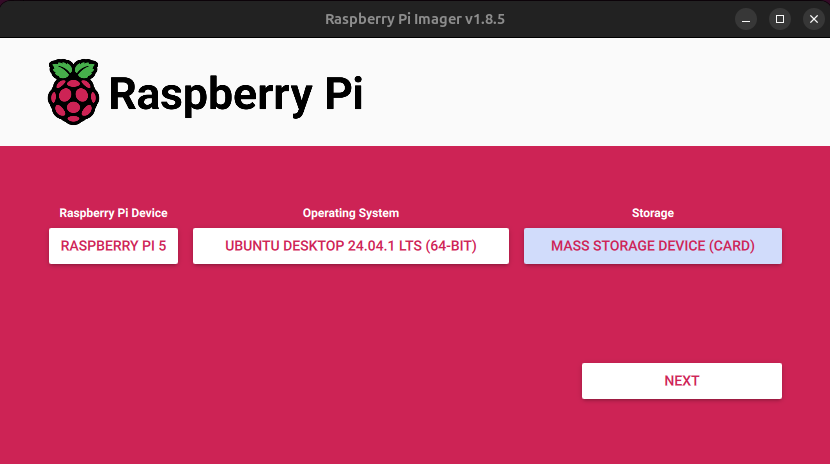
Figure 4.1.4.1: Settings of Raspberry Pi Imager
Warning
Ubuntu Desktop 24.04.1 LTS is under: Other general-purpose OS!
Danger
Make sure you have chosen the correct Storage Device as this will completely overwrite the device you select without any backup
Select yes and wait about 20 minutes for the software to set up your micro-SD card with Ubuntu 24.04.1 LTS.
Once it finishes, you are all set to remove the card from the reader.
4.1.5. Booting into Ubuntu
Insert the microSD card into your Raspberry Pi 5 and then search inside your microver.ch kit, for the:
Plug it into a wall outlet and into your Raspberry Pi 5 (make sure your SD card is already plugged in).
Danger
Now that your Raspberry Pi is powered up, be extremely cautious with how you handle it, always hold it by its side or by the USB ports, never put your fingers on the chips as the ElectroStatic Discharge (ESD) will kill the board in an instant.
Your Raspberry Pi 5 Onboard Computer is now booting into Ubuntu 24.04:
Red LED on means the board is powered on
Red LED blinking means the board is not receiving enough current
Green LED blinking means the board’s CPU is doing something
You should now find and plug in the following devices to comfortable use your Raspberry Pi:
Monitor (plugged into Raspi5 with micro-hdmi cable)
Keyboard (plugged into Raspi5 with usb-a cable)
Mouse (plugged into Raspi5 with usb-a cable)
Note
Make sure to use a simple mouse & keyboard plugged in with a standard USB cable as a device connected over bluetooth or over a 2.4Ghz dongle device might not work out of the box!!
You can also use the
4.3" Touchscreen Display
included with your microver.ch kit if you don’t have:
A monitor
A micro-hdmi cable
But keep in mind that this display is mostly for showing the current state of your Raspberry Pi onces it is integrated inside of your rover. It is not made for day-to-day developpement purposes as it it much too small, not designed to be balance vertical on a desk without a support and there are some display driver issues that can arise during setup:
Warning
If you absolutely must use the 4.3” display to setup the Raspberry Pi, skip the wifi configuration section as there is a known display driver issue where the window is larger than your screen and so you can’t press on the “next” button.
4.1.6. Setting up Ubuntu
Congratulations, you are booted into your brand new computer, it’s now time to set it up! The Ubuntu installer does a great job walking you through the steps from time-zone selection to wifi network connexion. Here is a recap:
System Language
Keyboard Layout
Timezone
Wifi Configuration
Computer Name & Username
Once you finish all this, you will see a tab displaying:

If you connected to the wifi during the setup, you will get a pop-up from System Updater asking you to install some updates and to reboot your computer, feel free to do it.
Now that everything is properly set up, you can proceed to install the software stack we will be using by reading through the Installing ROS2 section of the website.


Please signal any mistake to: errata@microver.ch